5 Methods to Remove Objects from Videos
.jpeg)
Method 1: AniEraser
सबसे पहले, आपको सबसे प्रतिष्ठित टूल को जानना होगा। AniEraser एक ऑब्जेक्ट रिमूवर है जो वस्तुओं को हटाकर आपके वीडियो को अधिक शक्तिशाली और आकर्षक बनाने में मदद कर सकता है। इस सहज उपकरण का उपयोग करके, आप बिना किसी सीमा के वीडियो से चीज़ें हटा सकते हैं। इसके अलावा, यह वीडियो को रीटच करने में भी मदद करता है, क्योंकि आप इससे दाग-धब्बे भी हटा सकते हैं।
इसके अलावा, आप देखेंगे कि चीजों को हटाने के बाद भी वीडियो की गुणवत्ता खत्म नहीं होगी। AniEraser की उच्च कार्यक्षमता अधिक से अधिक उपयोगकर्ताओं को आकर्षित करने में कभी विफल नहीं होती है। इस प्रकार, आप AniEraser के साथ अपने वीडियो को साझा-अनुकूल बना सकते हैं।
First, you need to know the most reputable tool. AniEraser is an object remover that can help make your video more powerful and attractive by removing objects with it. Using this intuitive tool, you can remove things from the video without limitations. In addition, it also helps in retouching the video, as you can also remove spots and blemishes with it.
Moreover, you will see that the quality of the video will not be lost even after you remove things from it. The higher functionality of AniEraser never fails to attract more and more users. Thus, you can make your videos share-friendly with AniEraser.
Supported Devices
- Windows, Mac, Online, iOS
Universal Key Features of AniEraser
- AniEraser has a very tidy and easy-to-use user interface. With this, you can accomplish all of your video tasks without facing any problems.
- The processing speed of AniEraser is ultra-fast. No matter if you are using an online, desktop, or mobile version, you will not see lags in it. n
- It is very budget friendly as you buy one license of AniEraser and use it on multiple platforms without any problem.
How to Remove Objects in Video with AniEraser
Removing objects in video with AniEraser is not a complicated task. You can do this perfectly by following the steps listed below:
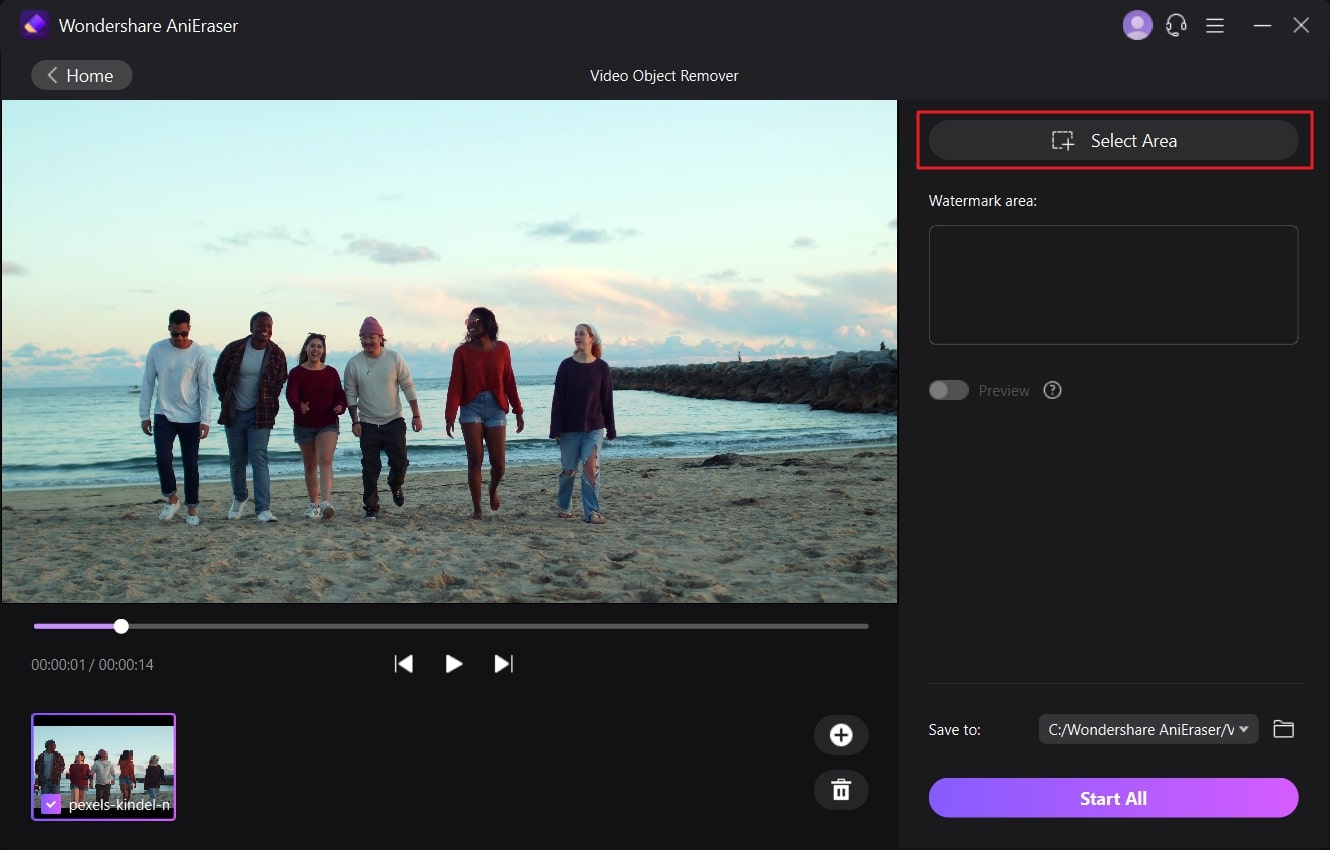
STEP 1 Access AniEraser and Import Video
STEP 2 Select Area and Remove the Object
इसके बाद, "क्षेत्र चुनें" विकल्प दबाकर ऑब्जेक्ट के चारों ओर एक क्षेत्र का चयन करें और फिर "पूर्वावलोकन" विकल्प को सक्षम करें। इससे आप देख सकते हैं कि ऑब्जेक्ट हटाने के बाद वीडियो कैसा दिखेगा।
Following this, select an area around the object by pressing the "Select Area" option and then enable the "Preview" option. By this, you can see how the video will look after object removal.
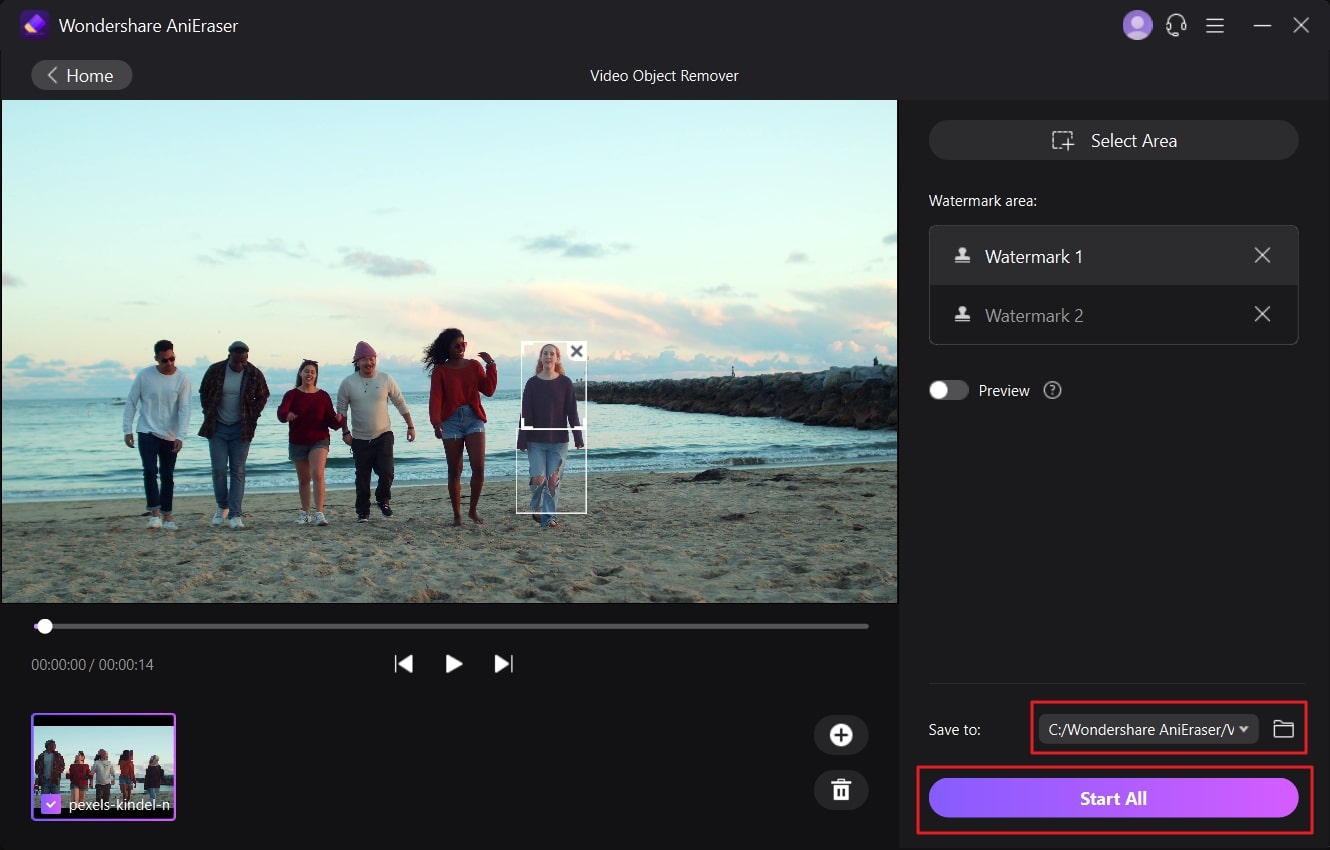
STEP 3 Save the Video in the Device
Afterward, disable the "Preview" option and click on the "Folder" icon to select a destination folder. Once the folder is selected, click on the "Start All" button.
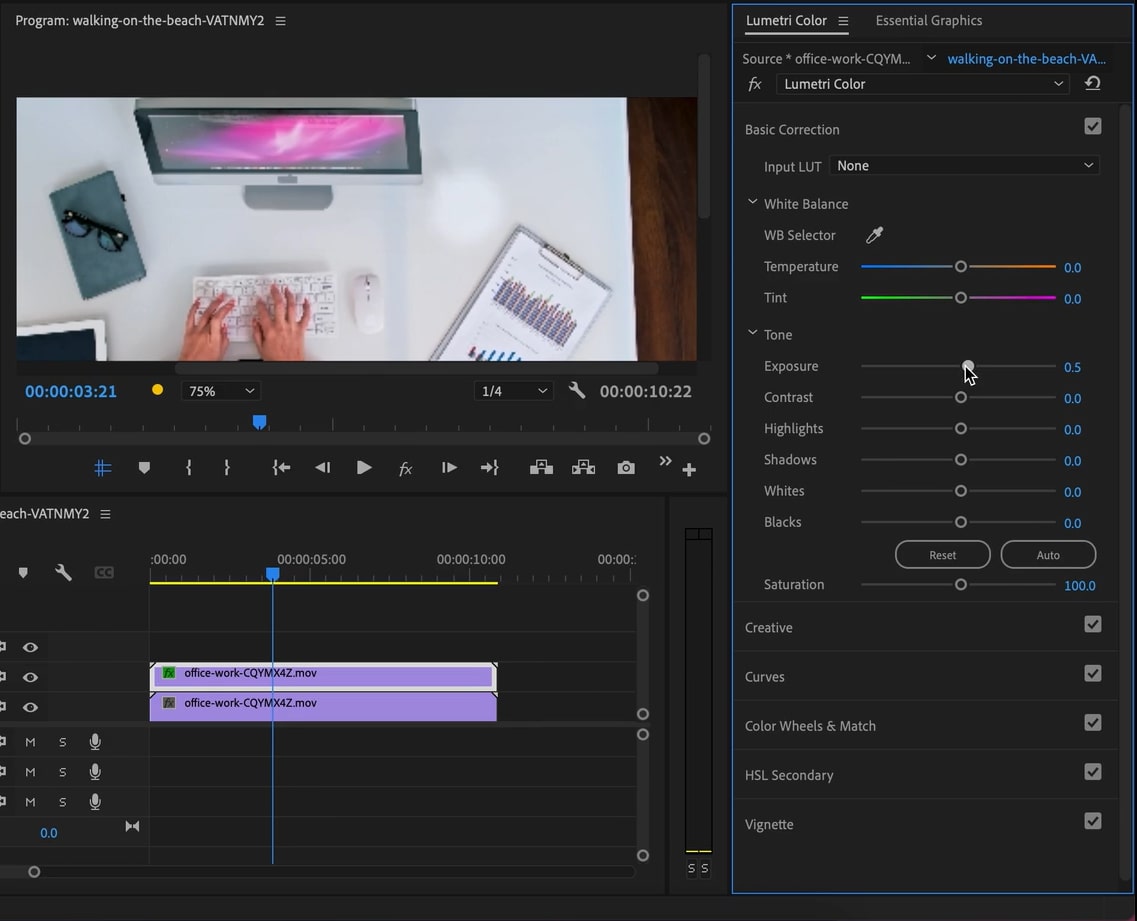
Method 2: Premiere Pro
Premiere Pro is one of the other industry-leading software used to remove unwanted objects from videos. This tool of Adobe can help you in maximizing the functionality of your video. Moreover, you will not face problems regarding interface and processing speed. Moreover, it also helps in enhancing the beautification of a video.
If you want to make a video personalized, you can also do this by using the features of Premiere Pro. However, make sure you know the editing metrics before using this tool.
Supported Devices
- Windows, Mac
Persuasive Key Features of Premiere Pro
- With this tool, you can remove both static and moving objects in a video. Thus, no matter if it's a text person or something else, it can help you with all.
- The process of removing unwanted objects from a video is not so complicated in Premiere Pro.
- You can also select an integrated time limit for the removal of the unwanted object from a video. Both starting and ending times that can be customized.
How to Remove Unwanted Objects from a Video with Premiere Pro
If you want to erase an object from the video, then the below-given instructions will help you a lot:
प्रीमियर प्रो के साथ वीडियो से अवांछित वस्तुओं को कैसे हटाएं
यदि आप वीडियो से किसी ऑब्जेक्ट को मिटाना चाहते हैं, तो नीचे दिए गए निर्देश आपकी बहुत मदद करेंगे:
STEP 1
To get started, access Premiere Pro on your device and import the video into it. After importing the video, drag it to "Timeline" and manage its length. After this, hold "Alt" and video in "Timeline" together to create a duplicate layer.
आरंभ करने के लिए, अपने डिवाइस पर प्रीमियर प्रो तक पहुंचें और उसमें वीडियो आयात करें। वीडियो आयात करने के बाद, उसे "टाइमलाइन" पर खींचें और उसकी लंबाई प्रबंधित करें। इसके बाद, डुप्लिकेट लेयर बनाने के लिए "टाइमलाइन" में "Alt" और वीडियो को एक साथ दबाए रखें।
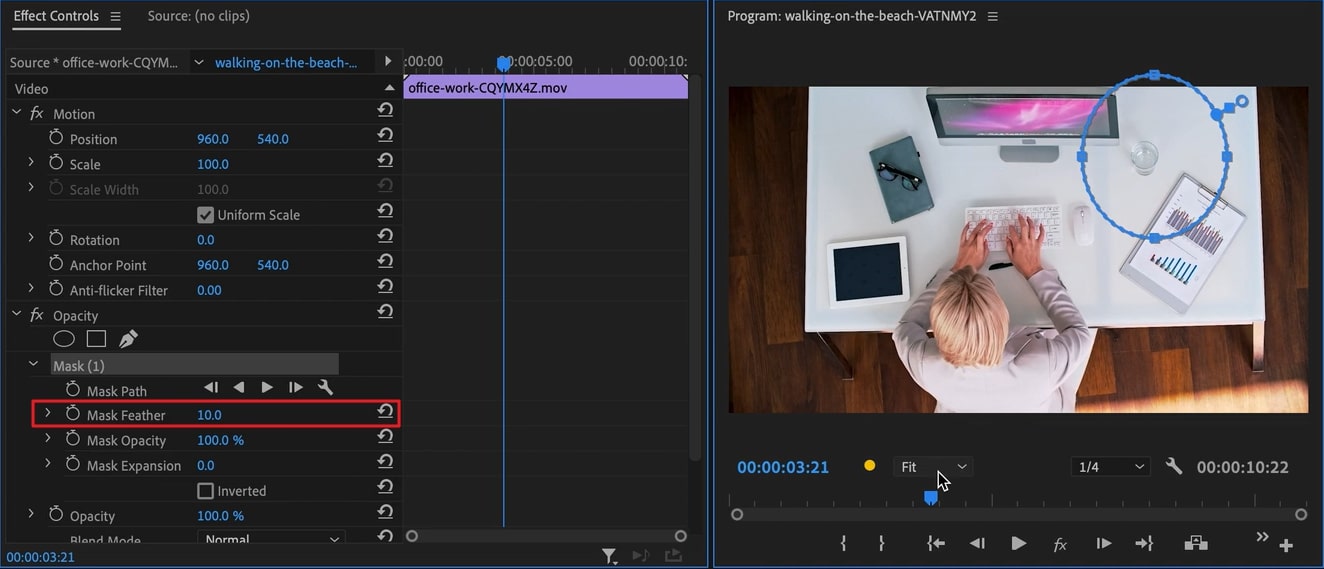
STEP 2
Once the duplicate layer of video is created, go to the "Effects Control" panel and select "Masking Tool" from here. Afterward, draw a mask around the object and access "Feather" in "Mask Setting." You can increase the feather for a better outline view.
STEP 3
Following this, go to "Position Properties" and move the text in an upward direction. Now, access the "Color Panel" and adjust the gradient until it blends smoothly.
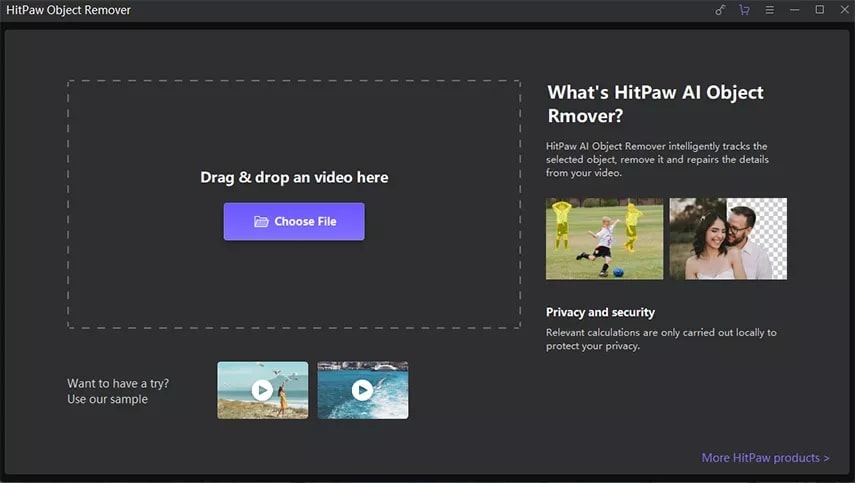
Method 3: HitPaw
HitPaw is an innovative desktop tool that can help you to remove moving objects from video. With this tool, you can enjoy this process without getting bored because of its illustrative interface. Other than this, HitPaw can do lots of video tasks for you. So, you can make your video free from unwanted objects along with good editing with the assistance of HitPaw.
Moreover, it supports diversified devices, so you can use it anytime and anywhere without any restrictions. You can also use its online version if you don't want to compromise the space of your device.
Supported Devices
- Windows, Mac
Persuasive Key Features of HitPaw
- With this tool, you can add aesthetic retouching to photos. It also supports various formats like BMP, PNG, and JPG, which you can use for conversion.
- Extracting audio, changing the speed of audio, and cutting it is a very easy things with HitPaw. You can also merge and compress audio files for your ease.
- You can loop, reverse, and mute videos with HitPaw conveniently. Moreover, it also allows you to face-animate the video and compress it for easy sharing.
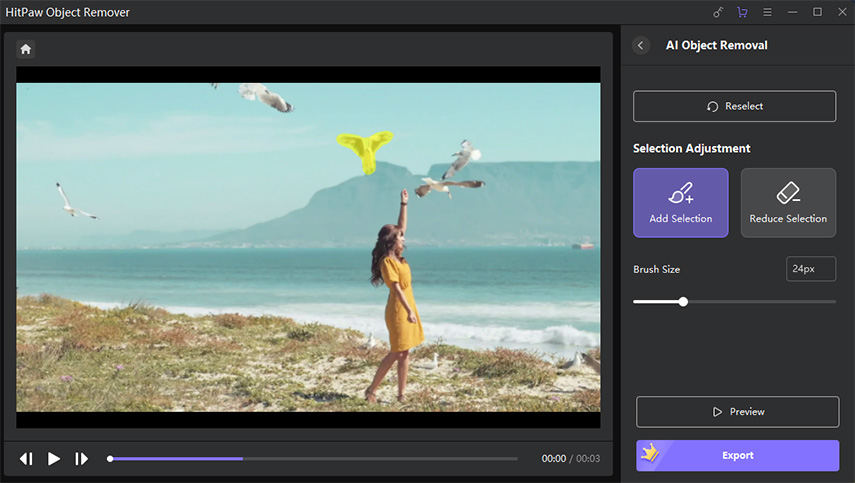
How Can You Remove Unwanted Objects In a Video With HitPaw
You can remove objects from a video by using HitPaw, even without any editing skills. Feel free to follow the enlisted steps to do better while implementing this task:
आप हिटपॉ के साथ वीडियो में अवांछित वस्तुओं को कैसे हटा सकते हैं
आप बिना किसी संपादन कौशल के भी, हिटपॉ का उपयोग करके किसी वीडियो से ऑब्जेक्ट हटा सकते हैं। इस कार्य को कार्यान्वित करते समय बेहतर करने के लिए सूचीबद्ध चरणों का बेझिझक पालन करें:
STEP 1
Open HitPaw on your device and import the video from which you want to remove objects. You can do this by clicking on the "Choose File" icon from the main interface.
अपने डिवाइस पर हिटपॉ खोलें और वह वीडियो आयात करें जिससे आप ऑब्जेक्ट हटाना चाहते हैं। आप मुख्य इंटरफ़ेस से "फ़ाइल चुनें" आइकन पर क्लिक करके ऐसा कर सकते हैं
STEP 2
After importing the video, click on the "AI Object Removal" button and frame the unwanted object. Now, click "Next" and adjust the removed area. You can also click on the "Reselect" icon if you are unsatisfied with the results.
वीडियो आयात करने के बाद, "एआई ऑब्जेक्ट रिमूवल" बटन पर क्लिक करें और अवांछित ऑब्जेक्ट को फ्रेम करें। अब, "अगला" पर क्लिक करें और हटाए गए क्षेत्र को समायोजित करें। यदि आप परिणामों से असंतुष्ट हैं तो आप "पुनः चयन करें" आइकन पर भी क्लिक कर सकते हैं।
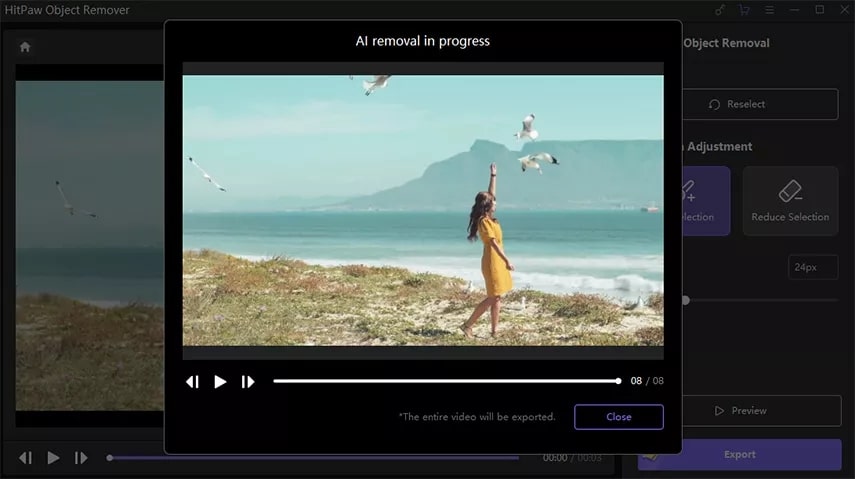
STEP 3
Once done with selecting an object, hit the "Preview" button to check the results without the unwanted object. If satisfied with the results, press the "Export" button on your device.
एक बार किसी ऑब्जेक्ट का चयन करने के बाद, अवांछित ऑब्जेक्ट के बिना परिणामों की जांच करने के लिए "पूर्वावलोकन" बटन दबाएं। यदि परिणामों से संतुष्ट हैं, तो अपने डिवाइस पर "निर्यात करें" बटन दबाएं।
Comments
Post a Comment